开发工具:HbuilderX+IDEA
前端
1.创建vue项目(已安装node.js和vue的脚手架cli)
在D盘新建文件夹Vue-SpringBoot 
在此处进入命令行

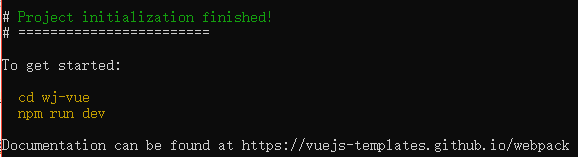
然后一路回车。

等待项目构建完毕
 进入项目
进入项目 cd D:\workspace\vue_springboot_demo
加载项目所需的依赖包,输入命令npm install
加载axios,输入npm install --save axios

启动项目:npm run dev

在浏览器输入localhost:8080 效果如下:
 将vue_springboot_demo拖到hbuilderX中
2.访问后端
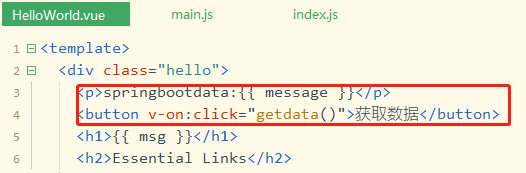
在HelloWord.vue增加访问后端内容
1
2
3
4
5
6
7
8
9
10
11
12
13
14
15
16
17
18
19
20
21
22
23
24
25
26
27
28
29
30
31
32
33
34
35
36
37
38
39
40
41
42
43
44
45
46
47
48
49
50
51
52
53
54
55
56
57
58
59
60
61
62
63
64
65
66
67
68
69
70
71
72
73
74
75
76
77
78
79
80
81
82
83
84
85
86
87
88
89
90
91
92
93
94
95
96
97
98
99
100
101
102
103
104
105
106
107
108
109
110
111
112
113
114
115
116
117
118
119
120
121
122
123
124
125
126
| <template>
<div class="hello">
<p>springbootdata:{{ message }}</p>
<button v-on:click="getdata()">获取数据</button>
<h1>{{ msg }}</h1>
<h2>Essential Links</h2>
<ul>
<li>
<a
href="https://vuejs.org"
target="_blank"
>
Core Docs
</a>
</li>
<li>
<a
href="https://forum.vuejs.org"
target="_blank"
>
Forum
</a>
</li>
<li>
<a
href="https://chat.vuejs.org"
target="_blank"
>
Community Chat
</a>
</li>
<li>
<a
href="https://twitter.com/vuejs"
target="_blank"
>
Twitter
</a>
</li>
<br>
<li>
<a
href="http://vuejs-templates.github.io/webpack/"
target="_blank"
>
Docs for This Template
</a>
</li>
</ul>
<h2>Ecosystem</h2>
<ul>
<li>
<a
href="http://router.vuejs.org/"
target="_blank"
>
vue-router
</a>
</li>
<li>
<a
href="http://vuex.vuejs.org/"
target="_blank"
>
vuex
</a>
</li>
<li>
<a
href="http://vue-loader.vuejs.org/"
target="_blank"
>
vue-loader
</a>
</li>
<li>
<a
href="https://github.com/vuejs/awesome-vue"
target="_blank"
>
awesome-vue
</a>
</li>
</ul>
</div>
</template>
<script>
export default {
name: 'HelloWorld',
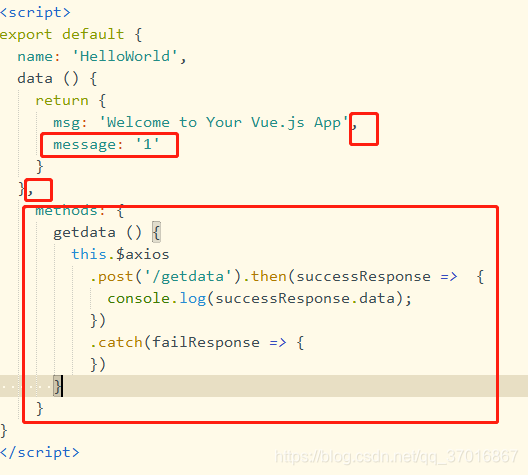
data () {
return {
msg: 'Welcome to Your Vue.js App',
message: '1'
}
},
methods: {
getdata () {
this.$axios
.post('/getdata').then(successResponse => {
console.log(successResponse.data);
})
.catch(failResponse => {
})
}
}
}
</script>
<!-- Add "scoped" attribute to limit CSS to this component only -->
<style scoped>
h1, h2 {
font-weight: normal;
}
ul {
list-style-type: none;
padding: 0;
}
li {
display: inline-block;
margin: 0 10px;
}
a {
color: #42b983;
}
</style>
|
3.前端相关配置
(1)设置反向代理
修改 src\main.js 代码如下:
1
2
3
4
5
6
7
8
9
10
11
12
13
14
15
16
17
18
19
| import Vue from 'vue'
import App from './App'
import router from './router'
// 设置反向代理,前端请求默认发送到 http://localhost:8443/api
var axios = require('axios')
axios.defaults.baseURL = 'http://localhost:8443/api'
// 注册axios
Vue.prototype.$axios = axios
Vue.config.productionTip = false
/* eslint-disable no-new */
new Vue({
el: '#app',
router,
components: { App },
template: '<App/>'
})
|
(2)跨域支持
在 config\index.js 中,找到 proxyTable 位置,
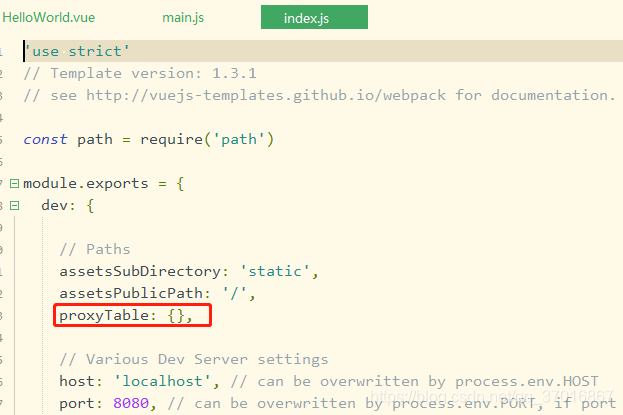
添加以下内容
1
2
3
4
5
6
| proxyTable: {
'/api': {
target: 'http://localhost:8443',
changeOrigin: true
}
},
|
 断开服务器Ctrl + C 然后Enter
运行服务器 npm run dev
后端
4.创建SpringBoot项目
创建一个springboot项目并运行起来
 第一次创建需要等待下载jar依赖
在application.properties文件中添加 server.port=8443
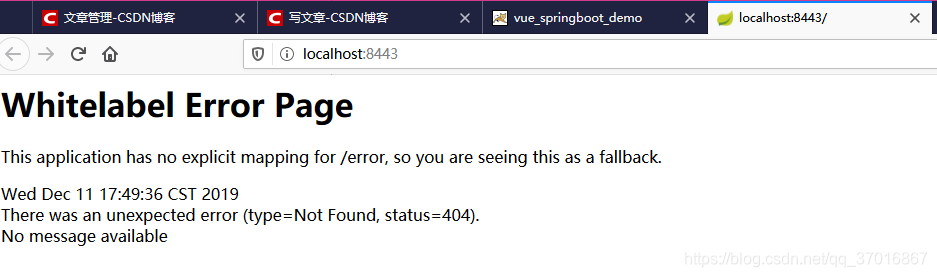
运行项目:
 浏览器输入:
localhost:8443,成功页面如下:
5.开发后端
在com.xiaoruiit.springbootdemo下新建包package controller,在包下新建类TestConnectController。内容为:
1
2
3
4
5
6
7
8
9
10
11
12
13
14
15
16
17
18
19
20
21
22
| package com.xiaoruiit.springbootdemo.controller;
import org.springframework.web.bind.annotation.CrossOrigin;
import org.springframework.web.bind.annotation.GetMapping;
import org.springframework.web.bind.annotation.PostMapping;
import org.springframework.web.bind.annotation.RestController;
@RestController
public class TestConnectController {
@GetMapping(value = "api/test")
public String test(){
return "hxr";
}
//@CrossOrigin 后端开启跨域访问
@CrossOrigin
@PostMapping(value = "/api/getdata")
public String getdata(){
return "hxr";
}
}
|
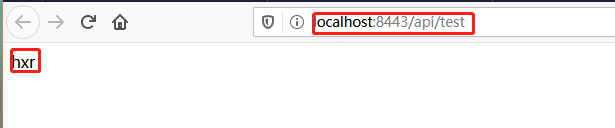
浏览器输入localhost:8443/api/test,可获取hxr。
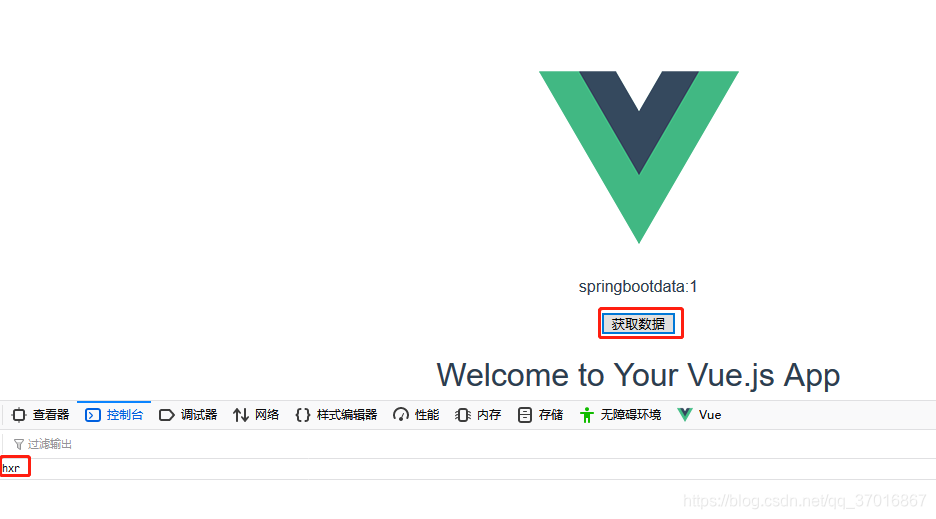
6.前后端联动效果
浏览器输入localhost:8080,点击获取数据,浏览器控制台打印出hxr